
What You Need
| What | Details |
|---|---|
| Windows 10 or 11 | Both programs are PC apps |
| .NET 8 Desktop Runtime | If the program won't start, download it here (pick "Desktop Runtime" for Windows) |
| Nintendo Switch | With custom firmware (Atmosphere) and sys-botbase installed |
| Animal Crossing: New Horizons | Running on your Switch |
| Your Switch's IP address | Found in Switch Settings > Internet > Connection Status |
| Same Wi-Fi network | Your PC and Switch need to be on the same network |
| URL/Domain | Not required but highly recommended for smoothest experience; purchase through Cloudflare for less work |
Optional (but recommended)
- ACNH Treasure Islands - You can create them inside SDT but it's not recommended to do major map editing while multiple switches are connected. Crash handling is weak at best right now.
Install sys-botbase
Most likely you already have this and the latest release but double check.
sys-botbase is a tiny background program on your Switch that lets your PC communicate with it.
- Download the latest release from sys-botbase on GitHub
- Extract the zip
- Copy the
atmospherefolder to your SD card root - The file should end up at:
SD:/atmosphere/contents/430000000000000B/exefs.nsp - Reboot your Switch
There's no visible indicator that it's running, it works silently in the background. You'll know it's working if SDT connects.
Recommended file organization
This alone can save you a lot of headache down the road.
Use something simple like 1, 2, 3. Masking tape on the back works perfectly.
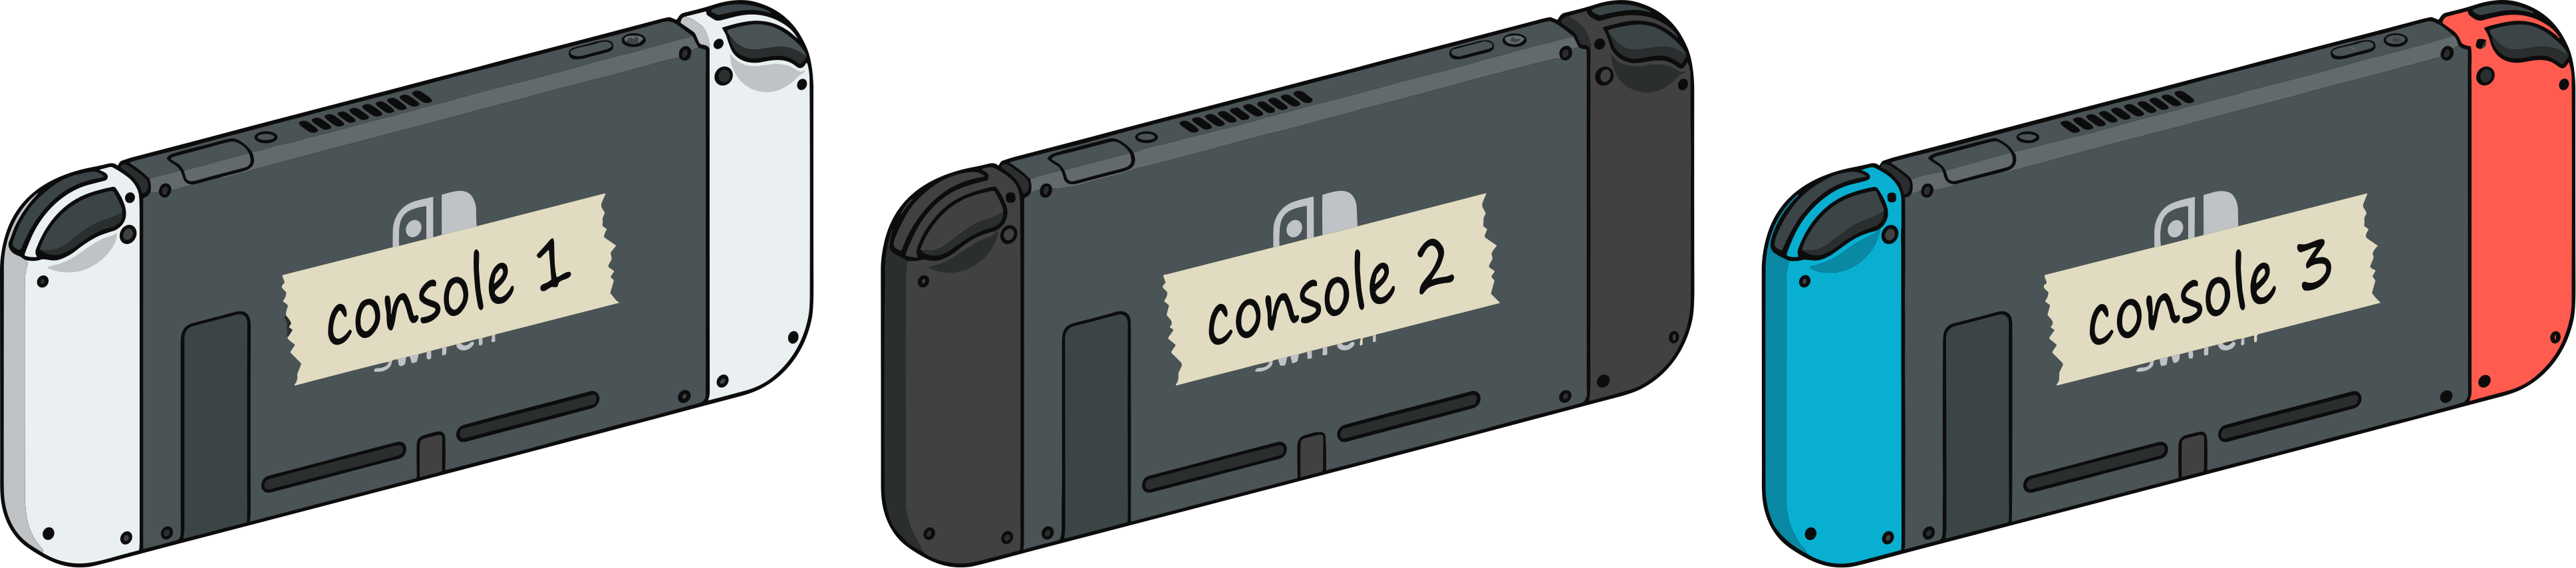
Example: Console 1, Console 2, Console 3
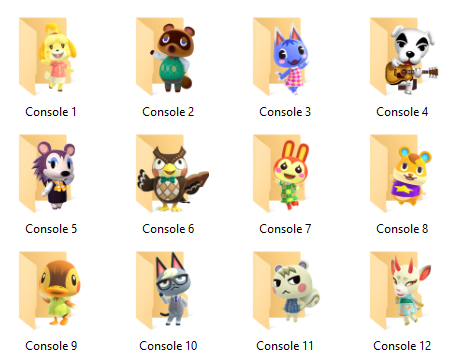
Optional: use these icons to visually separate them.
Use clear names like:
5 - Base SaveGarden5Clothes5Materials5
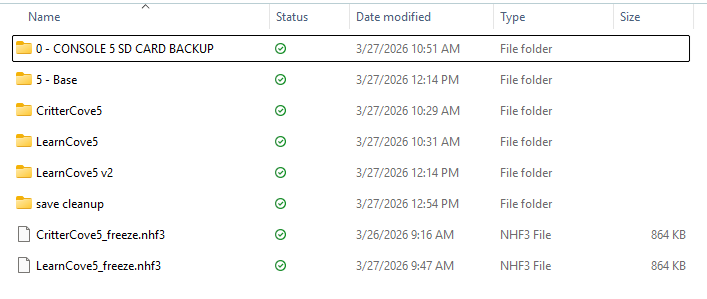
Things to keep backups of or organized well:
- Base saves (at least 1 dedicated "this save can open the gates successfully" save per CONSOLE)
- Treasure Islands
- Freeze Files (there are now two types - traditional freeze files which you may know well, and Freeze2 files used for automated map swapping. (Coming Soon!)
Find Your Switch's IP Address
- On your Switch, go to System Settings
- Go to Internet > Connection Status
- Write down the IP Address (looks like
192.168.1.50)
Download Super Dodo Terminal
- Download the latest release from www.thedodosuite.com
- Extract the zip to any folder (Desktop is fine)
- Run
SuperDodoTerminal.exe
You might see a Windows SmartScreen warning. Click "More info" then "Run anyway." Because this program is so new, Windows 11 may entirely block it, you'll have to turn SmartScreen off in settings if so.
Your First 5 Minutes
1. Launch Super Dodo Terminal
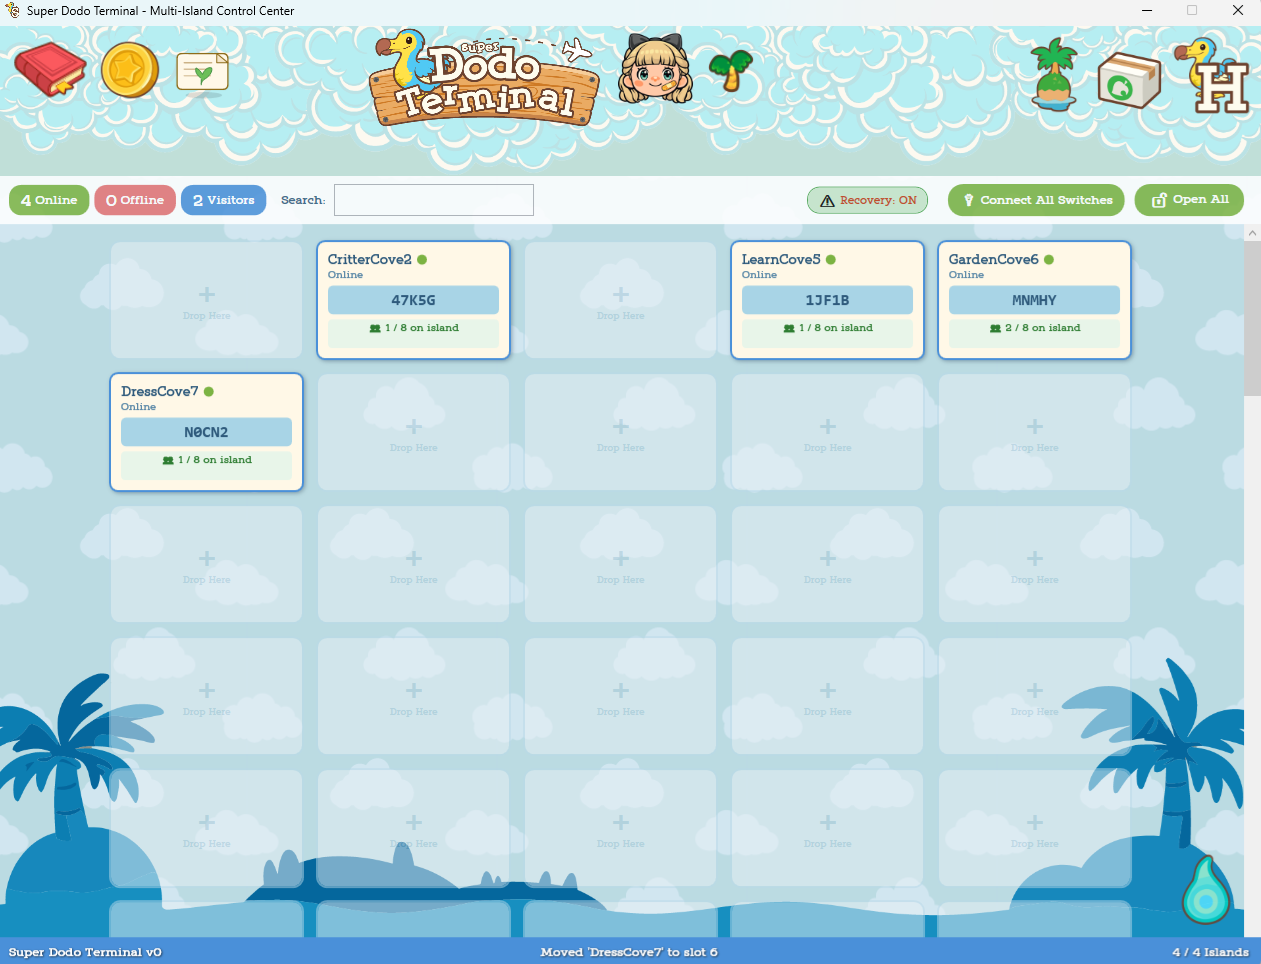
You'll see the Multi-Island Control Center featuring a grid of island slots and icons. This is your home base for everything.
App-wide SDT settings
Subscriptions and access tools
Requests and reports
View and manage profiles
Quick setup
Move island saves
Guided setup tools
Launch HostHelper
Clean export for issue reporting
2. Set Up a Profile
Each Treasure Island needs a profile.
A profile stores everything for that island, including:
- Switch IP
- Anchors
- Host settings
- Freeze map and behavior settings
You only need to set this up once per island.
Profiles are flexible. You can change Switch IPs at any time or move an island to another console using the Island Migrator.
Profile details
Profile groups
Console IP addresses

Profile list
Saved positions
Island tile links
Quick Setup Flow
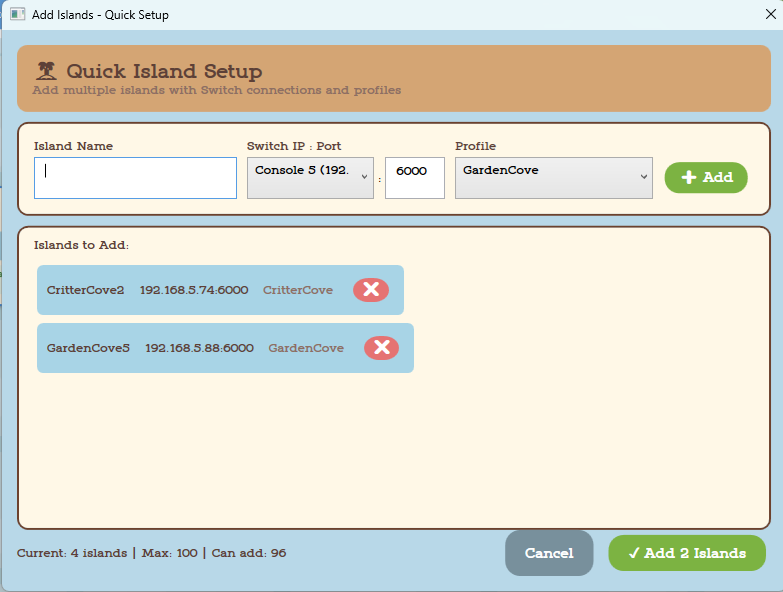
3. Add an Island
Click the Add Islands button
(![]() )
to open the Add Islands - Quick Setup panel.
)
to open the Add Islands - Quick Setup panel.
Treasure Island Name + Console Number/Name (ex: Garden2)
Use the dropdown menu to select a Switch profile and a Treasure Island profile.
When you click + Add, you’ll see a preview in the panel.
Continue adding islands, or click ✔ Add All Islands to finish.
4. Connect
Click to open the island details panel
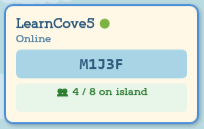 Island tile
It works just like that in the app!
→
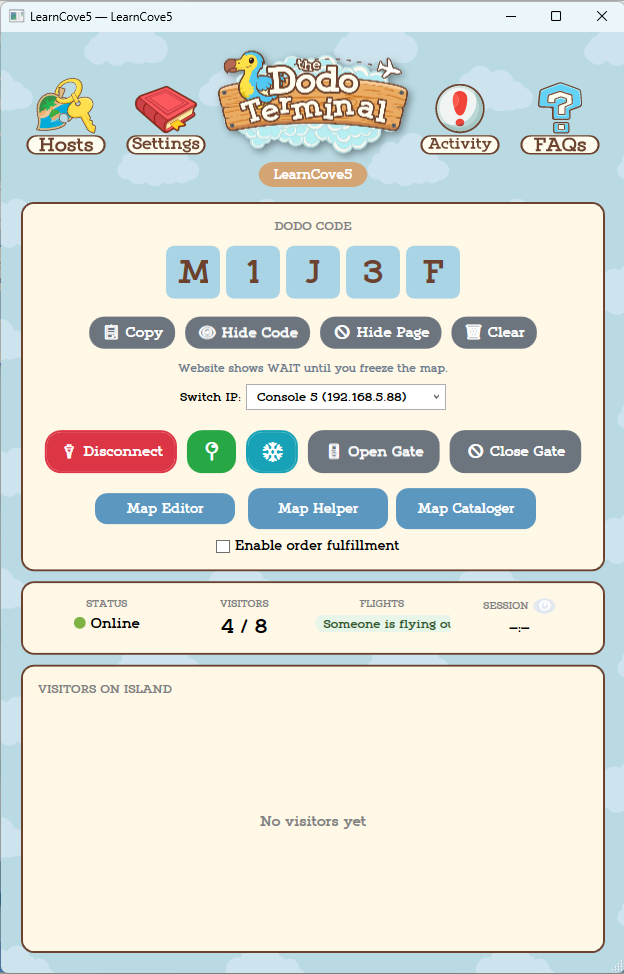
Island detail panel
- Double-check the IP address
- Make sure your Switch and PC are on the same Wi-Fi
- Verify sys-botbase is installed correctly
- Try restarting your Switch
5. Anchor Setup
Anchors are saved positions that tell the app where to teleport your character for gate control. You must set these before opening or closing the gate.
If you have multiple islands that have the same Airport location (same exact coordinates, they can't be even slightly different) you can bulk set the anchors for them in the Profile Viewer & Editor.
Where your character ends up after automation
Outside the airport, facing diagonally toward the door
Inside the airport, directly at the counter facing Orville
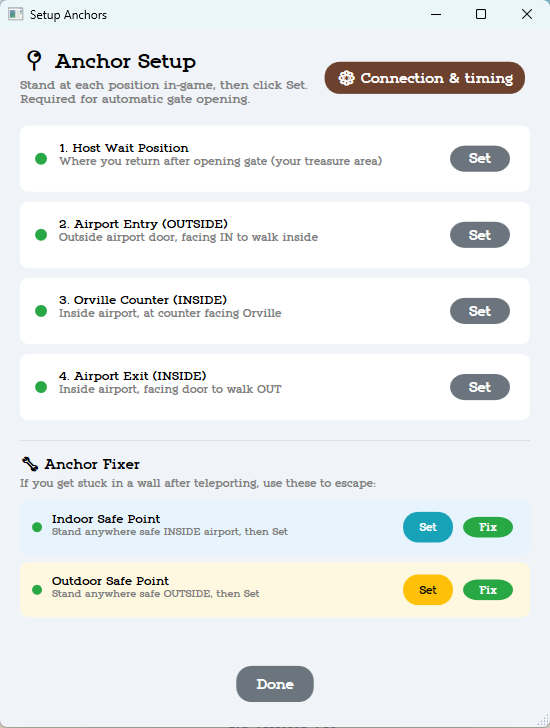
Inside the airport, in front of the walkway leading outside
Middle of the airport, used if you get stuck in walls
Safe spot on land (not the pier), used if you get stuck in the ocean
Setting Anchors
For each anchor:
- Walk your character to the correct location in-game
- Click Set
- The indicator turns green when saved
Once all anchors are set, click Save & Close.
You can optionally set the Fix anchors as a safety in case your character gets stuck.
6. Open the Gate!
Click Open Gate in Super Dodo Terminal. Then don't touch your controller! You don't have to remove your controllers. Virtual controller coming soon.
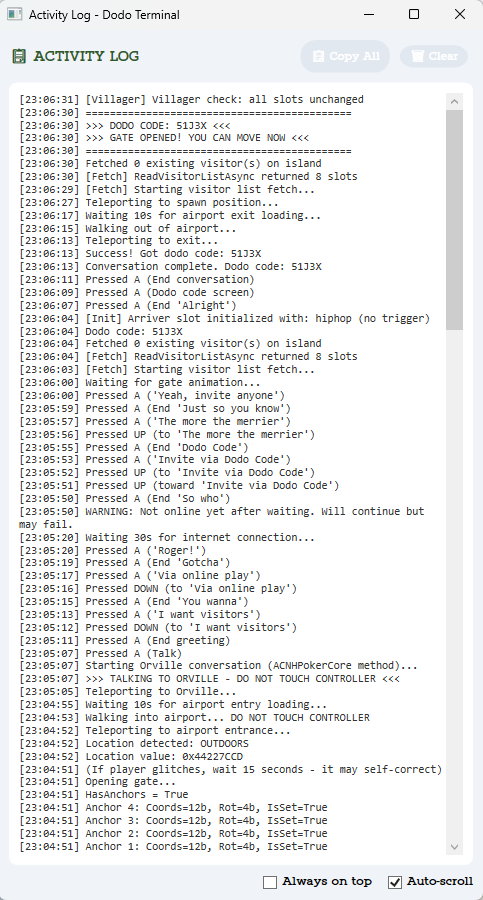
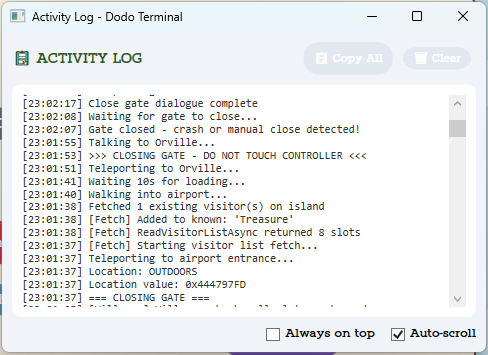
The program takes over
- Teleports your character to the airport entrance
- Walks into the airport
- Teleports to Orville and handles the dialogue
- Opens the gate and reads the Dodo code
- Exits the airport and returns to your spawn point
If your Dodo code appears in SDT once your gates open you can continue setting up.
Do You Need HostHelper?
Yes. You can technically run a limited, non-customized website using just SDT or your own set-up, but if you want:
- A team website — One site showing islands from multiple hosts
- A custom website — Your own branding, custom pages
- A plug and play experience
Start with both. See the HostHelper guide for details.
What's Next?
- Super Dodo Terminal — Learn about map freezing, visitor tracking, host settings, and everything else SDT can do
- Your Website — Show your islands online so visitors can find your Dodo codes
- Discord & Modmin — Post automatic updates to Discord
Updating
To update Super Dodo Terminal:
- Download the new version
- In the OLD version of SDT click the white cardboard box to the left of the HostHelper shortcut.
- Make sure "Update/Fresh Install Setup mode" is selected and click "Save Current Setup"
- Wait a few minutes for the folder to generate and save. It'll open the folder location once it's done. Copy the address bar to find it quickly in the next step.
- Open the new version of SDT and click the white cardboard box to the left of the HostHelper shortcut.
- Click "Import". It should open to the correct folder location but if it doesn't, paste what you copied.
- Let set up run.
- Happy Hosting!
This same process can be used for daily schedule changes too, when exporting just change mode to "Other Setups mode". Rename the exported folder so you can keep track of what it is. You can also add a .txt file listing the island pairs to the folder for quicker referencing. This is most useful if you want to run a set schedule of islands per day.
